If you are a new visitor, please note that I no longer am using this blog. My new site can be found at
A Rare Ruby Crafts. The new post for the ink combinations can be found
here. Thank you!
*all links and posts from this blog that were transferred to the new one will still link to old blog posts. Please disregard since I can't fix each one. if you have questions, just
send me a message. :)
---
My Sequins/Beads Organization + GIVEAWAY can be found
here.
The post about ink combinations for layering stamps can be found
here.
Be sure to check out my
Craft Items Sale!
---
The pink/gold ombre shaker card I created for
The Ton's Mid Summer Release was pretty popular and a few people asked me to make a video showing how it came together. However, I don't know how to make videos yet so the best I could do was show you step-by-step through pictures. Feel free to leave me feedback letting me know if this post has been helpful or not. Thank you so much for your interest!
Links to what I used are at the end of the post.
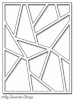
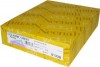
First, I took A2-sized white cardstock pieces that I had already pre-cut and used the
MFT Die-namics Abstract Cover Up die to cut out the top layer for the shaker card. I use
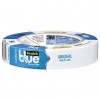
3M Painter's Tape to hold down my dies when running them through the
Big Shot.
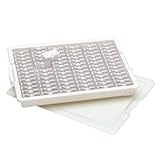
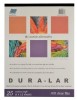
Once that was cut, I used
Glossy Accents to attach some of the
Grafix Dura-Lar Film behind it and cut off the excess on the sides. This is a great alternative to using acetate sheets. (Also, I started using these
Fineline Applicator Bottles that were recommended by Jennifer McGuire. No more having to unclog my Glossy Accents!)
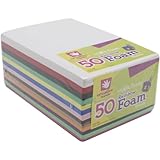
Then I used the
MFT Die-namics Abstract Cover Up to die-cut a piece of white foam.
I added
Glossy Accents on the top part and attached the first piece (that has the clear film on it) over the foam. Let it dry for a minute or so to secure in place.
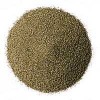
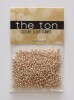
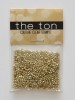
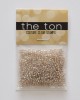
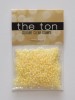
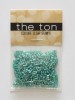
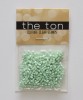
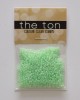
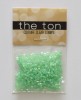
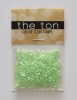
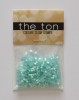
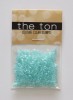
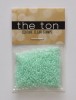
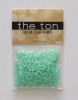
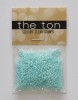
Now comes the fun part that we need to do slowly: adding the shaker contents! You can choose whether you want to add sequins or beads or other embellishments. I used The Ton's newest beads because I love their size and weight. My last card was pink/peach/gold and here I'll be using shades of aqua and gold. All the colors should be linked below.
Aren't those containers so cute? I have switched over to a brand new embellishment storage option, which is this
Darice 82-piece Tiny Container Storage Tray, and I have a
separate post that goes into detail about it (and a fun giveaway!). I selected all the colors that I want to use and set them on my workspace as shown. Once the foam side is up, I started to slowly and carefully place my beads over the film.
Once I have filled up all the parts of the die, I can close the shaker card. I add
Glossy Accents on every line of the foam so that I can seal properly. You have several options now. You can attach a piece of white cardstock that is the same size of the die over the foam and then attach this whole piece to your cardbase. You can attach a piece of the clear film in the same size as well (make sure you let it dry so that it sticks well). What I had done in my last card was guess and glue down my cardbase to the foam. It wasn't perfect, but it didn't add any unnecessary weight either. And, that's what I did here. I guessed and pressed down my cardbase to the foam and pressed down over the whole card firmly.
Once the shaker was sealed and glued to the cardbase, I turned it over to work on the top layers.
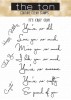
Now for the sentiment and foliage, I used a piece of white cardstock and
VersaMark ink to stamp a sentiment from
It's Cray Cray. I wanted the sentiment to be in two colors so I carefully sprinkled some
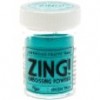
Hero Arts Gold Embossing Powder on parts of it, cleaned up the excess and then added on
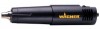
Zing Aqua Embossing Powder to the rest. I used my newest
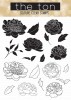
Wagner HT400 Heat Tool to heat set it. This is AMAZING. It is pretty much the replacement for the Milwaukee heat tool, and I'm so glad I upgraded because it heat sets FAST! Next, I stamped one of the foliage from
Mini Wild Florals and another from
Wild Peonies with
VersaMark ink and heat set them with
Hero Arts Gold Embossing Powder.
I fussy cut the sentiment and the foliage and used glossy accents to glue it down over the shaker card. That is all. I hope that my instructions and pictures were easy to follow.
Leave questions or comments below!
**You can find out more about how I use the
Darice 82-piece Tiny Container Storage Tray to store all my sequins, beads, and other embellishments + a fun GIVEAWAY in this post
here.**
**Disclaimer: Since I am part of the Amazon Affiliate programs, I receive a small commission (with
no additional costs to you) when you purchase through my links. I only link to products that I actually like and highly recommend. Thank you for visiting! ♡♡


amazing...love this style of shaker.
ReplyDeleteWow, Ruby! Your card is AWESOME and FUN and sure makes me Happy! Great job and thank you for the instructions. Hope you are able to find a way to make video tutorials soon as they would be crafting deliciousness!
ReplyDeleteThese instructions are very well detailed and easy to follow. I have learned about new products that I MUST HAVE, so you are upgraded from a fellow enabler to a PROFESSIONAL ENABLER!
I love this card and the colours you used make it so so so so so smart!! hugs!! :)
ReplyDeleteMe tooo.,LOVE this girl!!!!
ReplyDeleteGreat tutorial! I really love the colors you chose for the different compartments, so pretty.
ReplyDeleteI really like this idea for a shaker card. Awesome job. I would love to try it one day! Beautiful subtle colors
ReplyDeleteLOVELOVELOVE this!! Thank you so much for the tutorial!! I am definitely going to be making a similar card!!! Thanks for the knowledge and inspiration!
ReplyDeleteWow, what an awesome look! This cover up die makes for such a striking card!
ReplyDeleteI am so loving this die! What a beautiful shaker card! Thanks for the chance!
ReplyDeleteSo gaga over this ---odering from THE TON too!!!!!
ReplyDeleteSuper cool shaker! It looks so pretty!
ReplyDeleteWhat a fabulous tutorial and love each step by step on how this card became so magical with all those colors and beads! This is gorgegous Ruby
ReplyDeleteHoly wow, girl... fabulous!!
ReplyDelete=] Michele
Love this amazing shaker card!! The color combo is amazing!!!
ReplyDeleteI totally love the look of this card! Fantastic job! :)
ReplyDeleteOk, this is just awesome. So glad Jennifer McGuire posted your blog. Such fun. I love how you used the different colors in the section. It's just beautiful. Thank you for sharing.
ReplyDeleteAWESOME! Love it. Congratulations on the shout out at Jennifer's blog. 💕💕💕💕
ReplyDeleteAWESOME! Love it. Congratulations on the shout out at Jennifer's blog. 💕💕💕💕
ReplyDeleteWow the card is awesome!! Thanks for the organization tips too!
ReplyDeleteI absolutely love this card & those colors too!
ReplyDeletePerfect directions...personally I love picture tutorials
ReplyDeletePerfect directions...personally I love picture tutorials
ReplyDelete