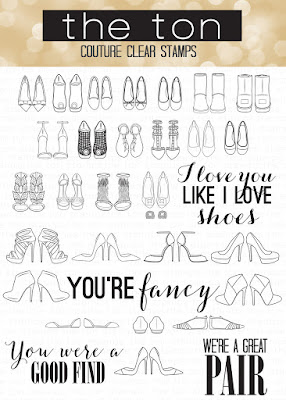
Showing posts with label stamps. Show all posts

Friday, June 5, 2015

The Ton's Third Release: Closer Look

Hi, everyone! I am so grateful for all the enthusiasm and responses we've gotten from fans of The Ton! I wanted to share a closer look at the sets that they just put up for preorder. Get your orders in today! They'll ship by June 15. WORTH THE WAIT!

Check The Ton website for more details on other stamp sets and the sequins/gilding that they carry! Trust me, they are GREAT quality! I LOVE using mine.

Visit The Ton blog for posts, especially from this week because the inspiration is MINDBLOWING. You will not regret it. :) You can see more details for the cards by Jessica and Mayline on their personal blogs. 
**GIVEAWAY DETAILS BELOW** 


Wild Peonies:


Peony Garden Cling Background:


GIVEAWAY: I am having a special giveaway for commenters who also subscribe to my blog! Leave a comment on ANY of my posts between June 1 to June 15, even if it is not related to The Ton, for a chance to win one of the sentiment sets that I co-designed: 

Thanks so much for all the support!!


Thursday, June 4, 2015

The Ton's Third Release: Day 4

Welcome to day 4 of The Ton's third release. Today, we are showing cards featuring Heart Diamonds. Check out their blog and leave a comment for a chance to win a stamp set of your choice! Stop by other Design Team members Jessica and Mayline's blogs for details on their cards! :-)

I created four cards with Heart Diamonds. I love that it's a versatile stamp set that can be stamped with ink pads in layers, heat embossed for dimension, or stamped with the outline and colored with any medium. The first three cards show how I used the outline heart stamps and watercolored with distress inks. The last card features a very CAS design and shows how beautiful it looks stamped in layers. The sentiments in this set are some of my favorite! 


I created a lot of really 'happy' backgrounds using blending tools and distress inks and Mama Elephant pigment inks. I picked random colors just to see where it would take me. For some of them, I added splatters of water, sprays of gold, black, or white inks, and then some shimmer mist. Some were colored completely and others were partially colored. My embossing paste has been sitting and collecting dust so I took it out for these cards... before I put the cards together, I stamped several of the heart outline stamps on watercolor paper and heat embossed them in clear. I colored them with distress ink markers and added some water to lighten the color in some areas. Then I fussy cut them all out. 


I added drops of different colored Distress Ink reinkers on my embossing paste on my kraft sheet to create these textured colors for the card. I used a Tim Holtz stencil for this card. It's hard to tell in the photo, but I used three colors... a yellow, an orange, and I tried to create pink but got a pretty dark one because I ended up adding too many drops of the reinker. Oh well :) 

I stamped the "fabulous knows fabulous" on black cardstock with VersaMark and heat embossed it with white embossing powder. This sentiment is from a set we'll be showing you tomorrow! I added a strip of white cardstock behind it to bring out more of the white of the sentiment. I trimmed down the card on both sides so I could add black strips. I arranged some of the colored hearts to the card and stuck them down with foam tape.

For my next card, I used less colors. ;-) 

This time, I used my metallic gold embossing paste. Why have I not used this yet???? It's GORGEOUS, especially paired with this beautiful soft color. This card was much simpler. I had colored the background with Mama Elephant pigment ink and added white and shimmer spray to it. Then I used the same stencil and added the embossing paste in a diagonal manner. The sentiment is from the Pyrotechnics stamp set that we showed you yesterday. I stamped it on white cardstock with VersaMark and heat embossed it with gold embossing powder. I fussy cut around it and added it with foam tape. I see to use a lot of foam tape... I love dimension! 


I added foam tape behind three matching heart outlines and arranged them over the embossed part. Once I knew where I wanted them, I added some gold thread behind them and pressed them down. I don't know if you can tell in this image below but I added some Zig Wink of Stella Clear Glitter to the hearts. You can also see the shine of the metallic gold embossed circles. 


For my third card, I thought of doing a shaker card, but I still used some embossing paste and inky background. I only used WPlus9's Lake House Spray Mist and added white embossing paste using another stencil. I thought the Papertrey Ink's Tag Sale #11 Die was rather unique to use here... it's more than just luggage tag, right?! I die-cut the pieces out using black cardstock and filled it with some of the heart outlines that I fussy cut earlier. I glued some down inside so all the pieces didn't fall to the bottom. I added pink and white twine to it and taped it down at an angle. The sentiment "you were a good find" was stamped on white cardstock with VersaMark and heat embossed with teal embossing powder. I fussy cut it and added it below the tag. The sentiment will be in a set we'll debut tomorrow. 


Here's a closer look at the tag contents. I love how this sentiment goes really well with the heart diamonds or any of our earlier diamond sets! 


My last card is really clean and simple! I love colors, but I try to create really different designs with all my cards. This was so easy to make, I could mass produce them. There are so many layer stamps out and finding the right colors for those layers has been a pain. I've got a lot of ink pads and experimented with various colors, but last week I discovered that I could use my Hero Arts Ombre Ink pads for layered stamps! Doh! So that's what I used here for the hearts below. Don't they look gorgeous? Don't need to search for different combinations now! I mean, you can still do that... lol. I stamped four of the hearts with all three layers in the various Hero Arts Ombre Ink pads and added the sentiment above in black dye ink. I taped it over black cardstock to give it a beautiful contrast. 


Here is a closer look at the hearts. I didn't stamp them perfectly but I think they came out great regardless. :)


I hope you enjoyed our design team's inspiration today. We love hearing what you have to say about the new release and our cards.

Come back every day this week and leave a comment on The Ton's blog posts for your chance to win a stamp set from the new release! 
Thanks for visiting! ♥ ♥ 

Linking to the following challenges: 

Tuesday, May 19, 2015

Selfies!

This is my second post today for a very special reason. If you're looking for my Butterfly Reflections Ink post, you can go here. One of my crafty friends is celebrating her one-year anniversary of blogging. Debra is such a sweetheart and always super supportive of me in my craft journey. I decided to celebrate along with her by using some Mama Elephant goodies. I created two cards using Photo Bomb, Smile, and Polaroid Fun


I stamped the larger group image in Memento Tuxedo Black ink and colored with random Copic markers. I die-cut the larger polaroid frame to frame around it. I colored white cardstock with a blue Copic marker and die-cut the word "smile." I took a pattern paper and heat embossed the sentiment "love your selfie" on the bottom. Then I rearranged the photo, frame, and word smile over it. I added some scallop borders using Lawn Fawn's Stitched Scalloped Borders and finished it with a touch of a cute floral washi tape. 


For my second card, I stamped and colored two of the smaller group images and die-cut small polaraoid frames. I colored the frames with Copic markers. I also cut the word bubbles and stamped the words "hi" and "smile" on them. I colored them with the same Copic markers to match the frames. I die-cut two pattern papers and rearranged everything as seen below. I actually decided to add a few of the phrases from the Three Amigos set in the background. I added some floral washi tape as a finishing touch.


Here are the two cards together: 

What do you think?? Isn't this such a fun set?? I colored a few more so I know I can make more cards later. :-)


Thanks so much for visiting, and please congratulate my friend Debra on her Blogiversary!!! Have a great week!

Thursday, May 7, 2015

True Friend

Good morning! I'm here with two more cards for you.

My first one features Altenew's Hennah Elements again. I loved playing with this set.


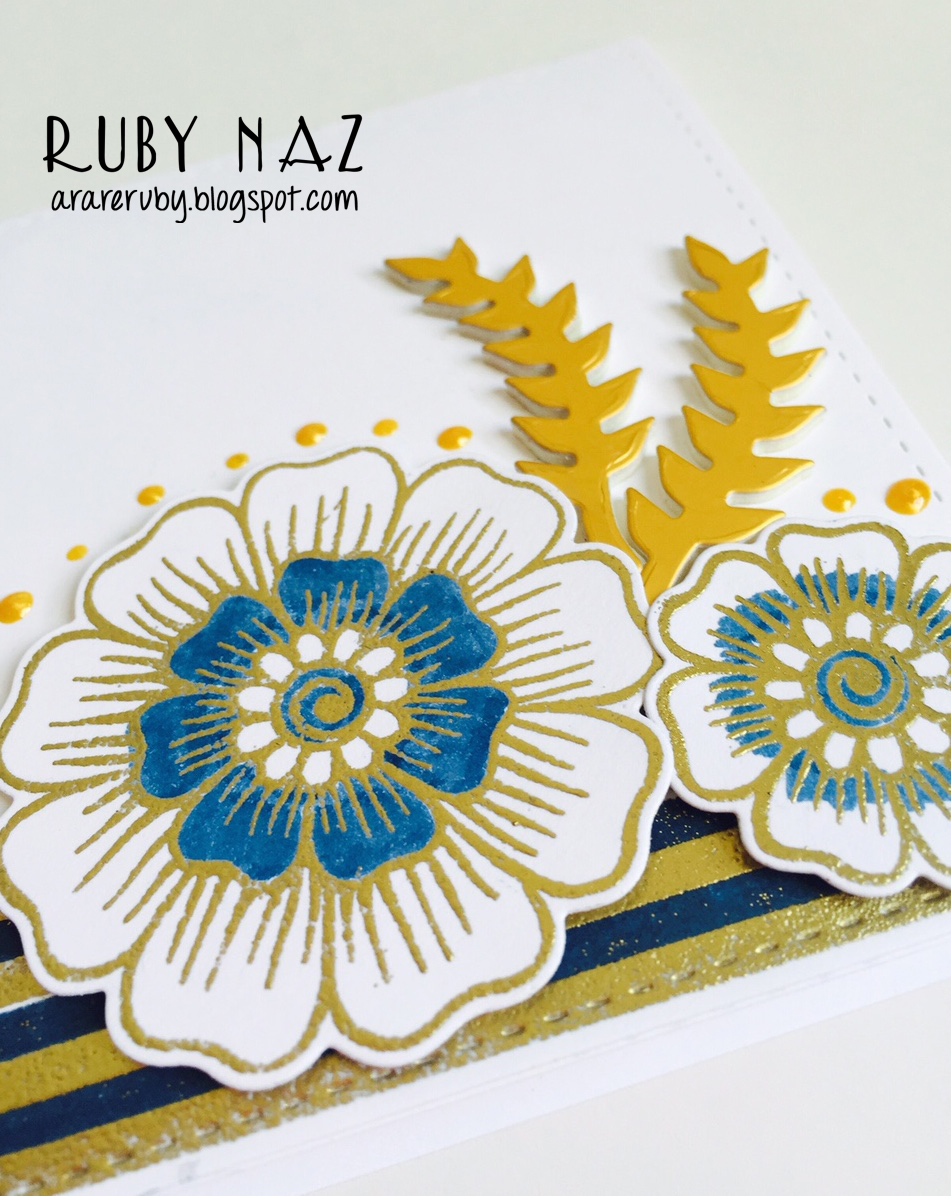
I took the second thinnest line from Winnie & Walter's Scenery: Stripes and stamped it in a dark blue dye ink. I stamped it again in VersaMark in the spaces next to the lines and heat embossed those in gold.


I stamped the flowers from Hennah Elements and heat embossed it in gold. I colored in the center petals with Chipped Sapphire distress marker to match the solid blue lines. I die cut the leaves in metallic gold without stamping the coordinating stamp on it. The sentiment was stamped using the same navy blue ink. I arranged the flowers and leaves to the right corner and added droplets of Irresistible Pico Embellisher in Gold. 


I love those stems! What a great color combination, don't you think? I think that's the most white space I've had on a card soooo CAS-success? :-) 


And here's my other card:


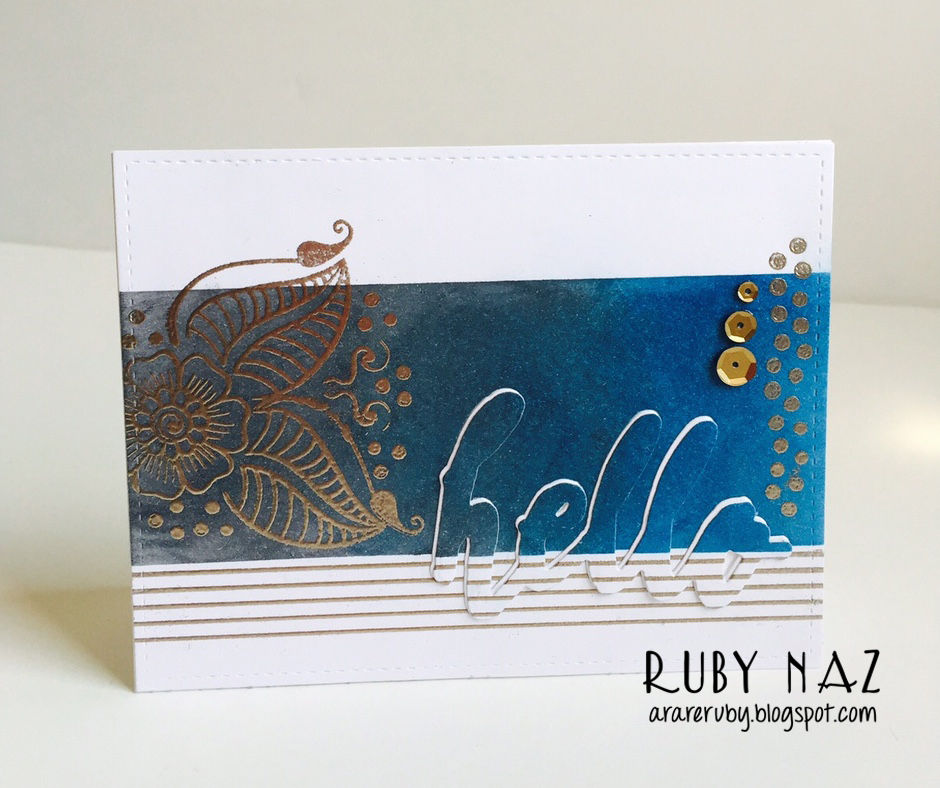
I am trying to use my stamps as much as I can. It's so easy to just keep buying stamps, but it makes no sense to only use them once or twice. So I continued to use Hennah Elements and wanted to try an in-laid die-cutting technique that everyone keeps talking about. Yes, I'm pretty late to doing my 'homework.'

First, I used some micropore tape and taped down on two sides of size A2 white cardstock. I used Mama Elephant's Stargazer and Dark Storm pigment inks and blended the colors together. This wasn't really planned -- I ended up picking random colors. I removed the tape when I had the space between the tapes all colored. I used the thinnest line from the Winnie & Walter set and stamped in VersaMark four times under the coloring and heat embossed them in gold.


I rearranged stamps from Hennah Elements to create a hennah pattern on the left side and some dots on the right side. I stamped them in VersaMark and heat embossed in gold. I took the large 'hello' die from Halftone Hello Dies and die cut it from the piece. I die-cut the same hello from white cardstock and added it behind the colored 'hello' to allow it to show more. I glued it down with some Multi Medium Matte and added some Medallion Gold sequins in the upper right side. 


Thanks so much for stopping by! If you haven't already done so, please check out my cards from earlier this week: hello, The Ton, and Butterfly Reflections Ink. Have a great week!

Wednesday, May 6, 2015

Hello, Hello

I have some exciting news to share -- I finally came up with a watermark!! You must be thinking that I'm crazy. Haha. I don't know why I waited this long. If you follow me on Instagram, you might have seen this sneak peek of a few cards I made recently. When I'm crafting, my desk gets really messy so I figure I should make as many cards as I can before I need to clean up. I really don't like messy desks. I'm going to share two of the cards today.


I love Altenew stamps. I used Hennah Elements and the Halftone Hello die for this card. That fabulous pattern paper? It's from this paper pad. I LOVE IT. 


I stamped the flowers on white cardstock with VersaMark ink and heat embossed it in gold. I used distress markers to color in the centers and left the outer petals white. I die-cut the word 'hello' using the larger die from a metallic gold cardstock and also double-sided foam sheets so that I didn't have to struggle with adding tiny foam dots on the back. I added the flowers with foam tape and the word hello over the pattern paper. I added a few drops of Irresistible Pico Embellisher in Gold and Wedding Dress


And here's my second card:


This card was inspired by Yana's post here. She's such a creative lady! I used Whimsical Flowers and Halftone Hello. Like Yana, I stamped the hello in the center so I could stamp the flowers around it. I stamped some of the solid flowers using WPlus9 inks. Then I stamped the outline stamp in VersaMark and heat embossed it in gold (no, seriously, obsessed with gold embossing! I might have to get more shades!)


I don't know if you can see, but I stamped the 'hello' again in VersaMark and heat embossed it in clear to give it a shine. I die-cut the white cardstock using the scalloped outline die from Sunshine Layers and added it to a metallic gold cardstock. The white piece was added with foam tape - again, I love dimension! ;-) 


What do you think?? I'll be back tomorrow with full views of my other two cards! Don't forget to check out my post on The Ton blog today and my post on the Butterfly Reflections Ink blog from yesterday! Thanks so much for your sweet comments!! 

Friday, February 13, 2015

PTI Anniversary Challenge Day 8: Blue Ombre

Papertrey Ink's Day 8 Challenge asked us to create a blue ombre look however we wanted it to be, whether in a sentiment, background, in images, etc. I decided to go with a sky background using different blue distress inks. Colors included Tumbled Glass, Salty Ocean, Stormy Sky, and Chipped Sapphire.

I think it came out gorgeous! I love creating these. I used their Zappy Birthday stamps and dies and Mama Elephant's Tiny Heroes. The beautiful blue sequins around the card can be found at The Ton.


Ohh, would love for you to check out The Ton's first video! Please leave her some love. We are planning a few great things for you in the coming weeks! Thanks so much for all your comments and love. 

Linking this to the following challenges: