If you are a new visitor, please note that I no longer am using this blog. My new site can be found at
A Rare Ruby Crafts. The new post for the ink combinations can be found
here. Thank you!
*all links and posts from this blog that were transferred to the new one will still link to old blog posts. Please disregard since I can't fix each one. if you have questions, just
send me a message. :)
---
My Sequins/Beads Organization + GIVEAWAY can be found
here.
The post about ink combinations for layering stamps can be found
here.
Be sure to check out my
Craft Items Sale!
---
The pink/gold ombre shaker card I created for
The Ton's Mid Summer Release was pretty popular and a few people asked me to make a video showing how it came together. However, I don't know how to make videos yet so the best I could do was show you step-by-step through pictures. Feel free to leave me feedback letting me know if this post has been helpful or not. Thank you so much for your interest!
Links to what I used are at the end of the post.
First, I took A2-sized white cardstock pieces that I had already pre-cut and used the
MFT Die-namics Abstract Cover Up die to cut out the top layer for the shaker card. I use
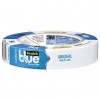
3M Painter's Tape to hold down my dies when running them through the
Big Shot.
Once that was cut, I used
Glossy Accents to attach some of the
Grafix Dura-Lar Film behind it and cut off the excess on the sides. This is a great alternative to using acetate sheets. (Also, I started using these
Fineline Applicator Bottles that were recommended by Jennifer McGuire. No more having to unclog my Glossy Accents!)
Then I used the
MFT Die-namics Abstract Cover Up to die-cut a piece of white foam.
I added
Glossy Accents on the top part and attached the first piece (that has the clear film on it) over the foam. Let it dry for a minute or so to secure in place.
Now comes the fun part that we need to do slowly: adding the shaker contents! You can choose whether you want to add sequins or beads or other embellishments. I used The Ton's newest beads because I love their size and weight. My last card was pink/peach/gold and here I'll be using shades of aqua and gold. All the colors should be linked below.
Aren't those containers so cute? I have switched over to a brand new embellishment storage option, which is this
Darice 82-piece Tiny Container Storage Tray, and I have a
separate post that goes into detail about it (and a fun giveaway!). I selected all the colors that I want to use and set them on my workspace as shown. Once the foam side is up, I started to slowly and carefully place my beads over the film.
Once I have filled up all the parts of the die, I can close the shaker card. I add
Glossy Accents on every line of the foam so that I can seal properly. You have several options now. You can attach a piece of white cardstock that is the same size of the die over the foam and then attach this whole piece to your cardbase. You can attach a piece of the clear film in the same size as well (make sure you let it dry so that it sticks well). What I had done in my last card was guess and glue down my cardbase to the foam. It wasn't perfect, but it didn't add any unnecessary weight either. And, that's what I did here. I guessed and pressed down my cardbase to the foam and pressed down over the whole card firmly.
Once the shaker was sealed and glued to the cardbase, I turned it over to work on the top layers.
Now for the sentiment and foliage, I used a piece of white cardstock and
VersaMark ink to stamp a sentiment from
It's Cray Cray. I wanted the sentiment to be in two colors so I carefully sprinkled some
Hero Arts Gold Embossing Powder on parts of it, cleaned up the excess and then added on
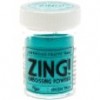
Zing Aqua Embossing Powder to the rest. I used my newest
Wagner HT400 Heat Tool to heat set it. This is AMAZING. It is pretty much the replacement for the Milwaukee heat tool, and I'm so glad I upgraded because it heat sets FAST! Next, I stamped one of the foliage from
Mini Wild Florals and another from
Wild Peonies with
VersaMark ink and heat set them with
Hero Arts Gold Embossing Powder.
I fussy cut the sentiment and the foliage and used glossy accents to glue it down over the shaker card. That is all. I hope that my instructions and pictures were easy to follow.
Leave questions or comments below!
**You can find out more about how I use the
Darice 82-piece Tiny Container Storage Tray to store all my sequins, beads, and other embellishments + a fun GIVEAWAY in this post
here.**
**Disclaimer: Since I am part of the Amazon Affiliate programs, I receive a small commission (with
no additional costs to you) when you purchase through my links. I only link to products that I actually like and highly recommend. Thank you for visiting! ♡♡


